Starting from a tutorial I found recently, I want to share how to change your default font in Windows 10 – but in a shorter edition than that long one (and in, I think, a less-confusing way).
Back in the Good Ole Days™, you could easily change system font preferences by right-clicking on your desktop, and going into the themes and personalization tab to set whatever you wanted however you wanted (this is also where you could turn off (or back on) icons on your desktop (like My Documents), set window border widths, colors for everything, etc).
Windows 10 doesn’t let you do that through any form of Control Panel anymore, so you need to break-out the Registry Editor*.
0th, Start regedit
WindowsKey-R brings up the Run dialog – type regedit to start the Registry Editor

NOTE: you should back-up any keys you plan to edit, just in case you forget what you did, want to revert, or make a mistake.
1st, Navigate to the right key area
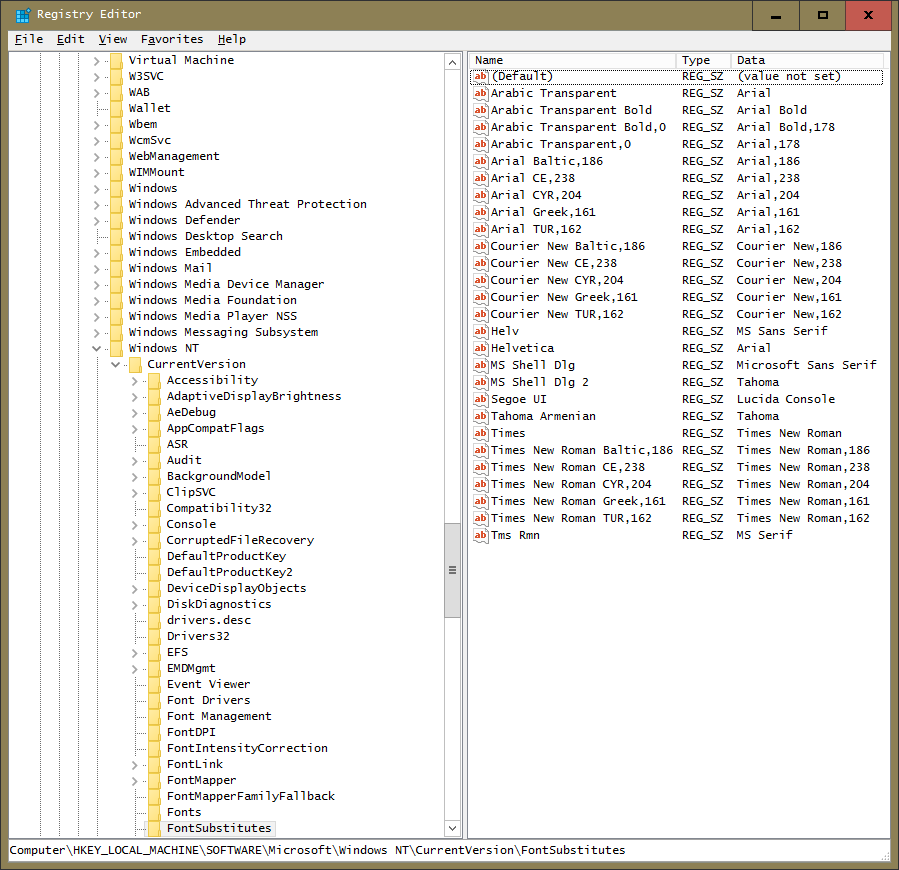
HKEY_LOCAL_MACHINE\SOFTWARE\Microsoft\Windows NT\CurrentVersion\FontSubstitutes
 &&
&&
HKEY_LOCAL_MACHINE\SOFTWARE\Microsoft\Windows NT\CurrentVersion\Fonts
 Are where you’ll need to be to make these changes.
2nd, Blank entries for Segoe UI
For all of the “Segoe UI” entries in Fonts, change their Data field to blank (“”)
3rd, Add a Segoe UI substitute font
In FontSubstitutes, click Edit->String Value. Name it “Segoe UI” (without the quotes). In the “Value data” field, enter your preferred font name. I used Lucida Console.

4th, Logout, or reboot, and login again to see your changes take effect.
* You can also download my registry keys, which have the substitution already done here. And you can pick any other font instead of Lucida Console you like – just edit the key file in your favorite text editor (I like TextPad) before merging into your Registry.